bookmark_borderTridactyl: a Vim-like interface for Firefox

Today I would like to talk about one of my favorite extensions for Firefox: Tridactyl.

The official website is here and the source code can be found on Github here.

Extracted from their Github repository:

Replace Firefox's default control mechanism with one modelled on the one true editor, Vim.

The main point being: it allows you to browse the internet with vim keybindings and workflows. For instance: j/k will move you through a web page or H/L will move you back and forward through the history.

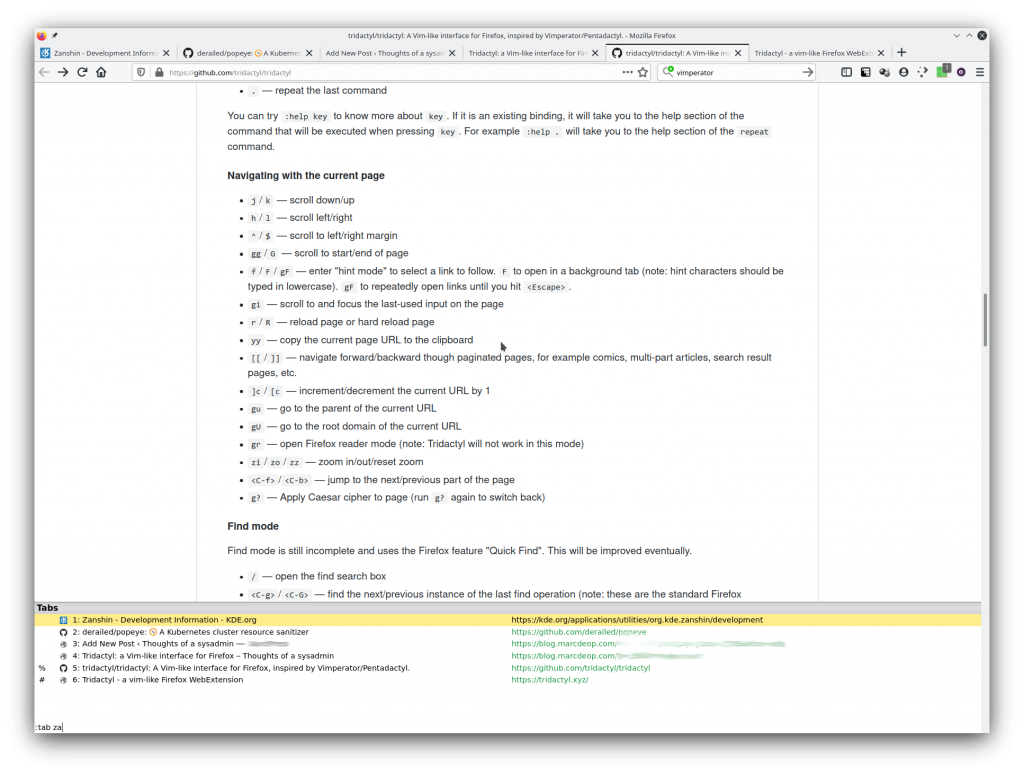
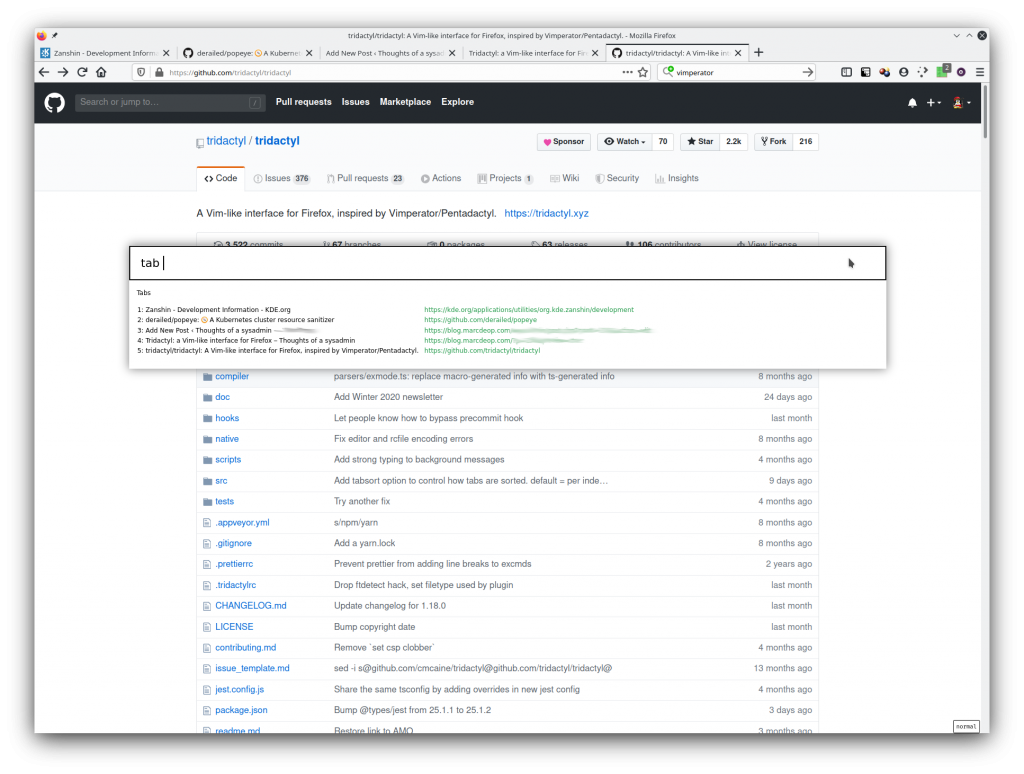
We can also browse through our opened tabs as if they were buffers by pressing b:

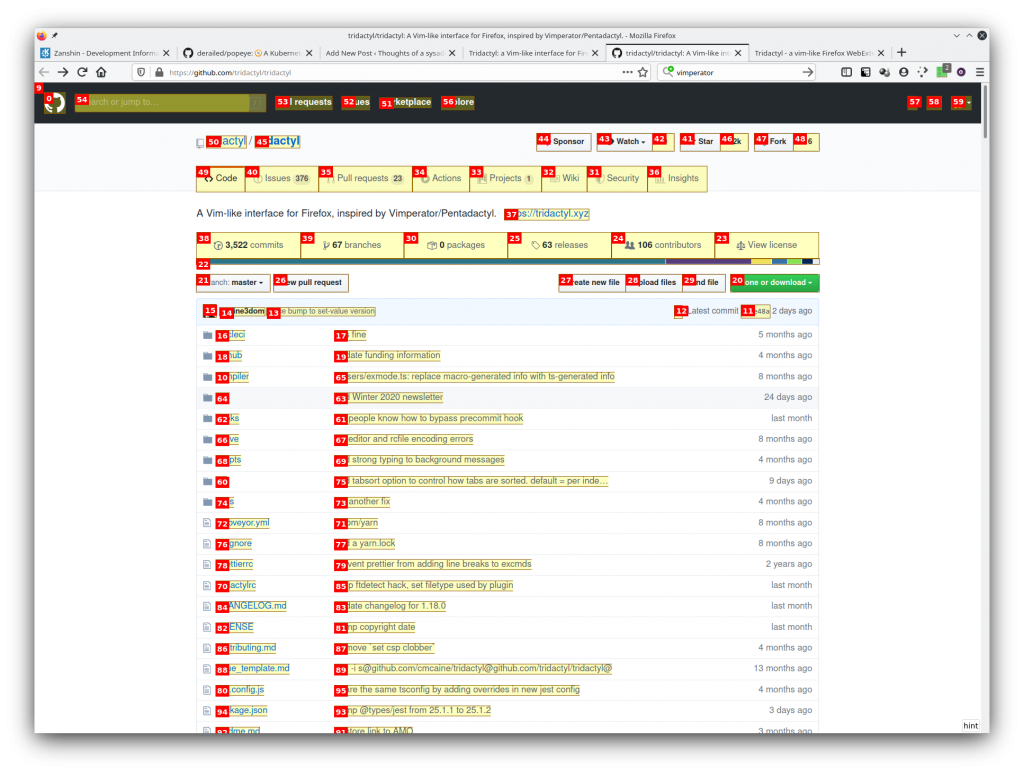
The hint mode is the feature! Press f and you will see:

This will label all the hyperlinks (and other elements) and you will be able to follow the hyperlinks by typing the label.

I have a few custom settings for the extension though.

For instance, the default key-bindings to move through the tabs is a bit counter-intuitive (at least to me) so I have those re-mapped:

:bind J tabnext
:bind K tabprev

I like the way Vimperator used to do the hint mode so I have that enabled as well:

:set hintchars 543167890
:set hintfiltermode vimperator-reflow

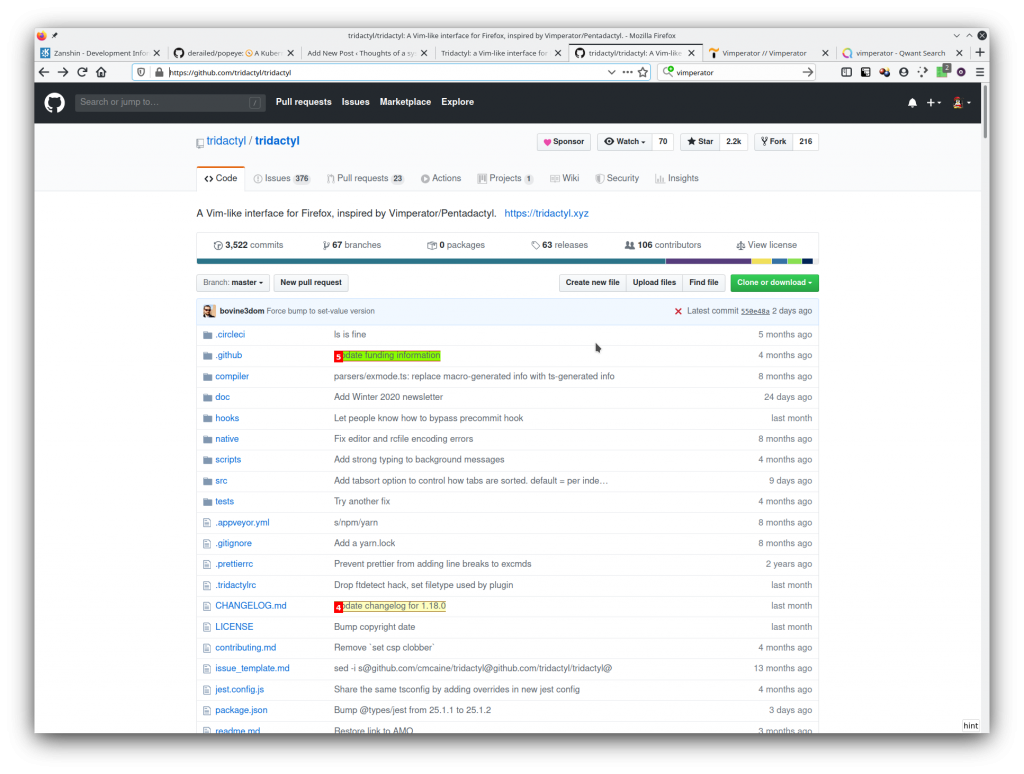
With the above settings you will be able to type the text that you see in the hyperlinks and the extension will reduce the number of options that you have to follow links. For instance, on https://github.com/tridactyl/tridactyl, enter into hint mode via f and then type update:

See? Now you only have two hyperlinks to follow (the ones that contain what you typed)

I also like using a different theme so I have

:colors shydactyl

Tridactyl is very powerful, make sure to go through the readme and :help to find all the options that it offers

bookmark_borderSelf-hosted Firefox Sync Server

A couple of months ago I started setting up several services on my own servers to get rid of many third party dependencies like Google. Even though Mozilla is nothing like a big Mega-Corp I still like the idea of not depending on third parties ( or even if you do, that you can migrate easily to another provider).

In this post I will explain how I have set-up my own Firefox Sync Server. Most of my information has been extracted from here and here.

I, obviously, did some research online before I started doing something like this from scratch. I found several posts like this one or this one but all of them look like people just want to make things work without digging too much into how things really function. Indicators for this were the usage of FF_SYNCSERVER_FORCE_WSGI_ENVIRON or SYNCSERVER_FORCE_WSGI_ENVIRON were I could see that they were not really understanding what was happening under the hood.

Here you can find my docker-compose:

version: '3.5'

networks:
  world:
    external: true

services:

  syncserver:
    image: mozilla/syncserver:latest
    container_name: syncserver
    restart: on-failure
    networks:
      - world
    volumes:
      - /srv/syncserver:/data
    expose:
      - "5000"
    environment:
      - "SYNCSERVER_ALLOW_NEW_USERS=false"
      - "SYNCSERVER_PUBLIC_URL=https://your.fqdn.here"
      - "SYNCSERVER_SECRET=$SYNCSERVER_SECRET"
      - "SYNCSERVER_SQLURI=sqlite:////data/syncserver.db"
      - "SYNCSERVER_FORWARDED_ALLOW_IPS=127.0.0.1,172.18.0.2,172.18.0.1"
      - "SYNCSERVER_BATCH_UPLOAD_ENABLED=true"
      - "SYNCSERVER_FORCE_WSGI_ENVIRON=false"
      - "PORT=5000"
    labels:
      - "traefik.frontend.rule=Host:your.fqdn.here"
      - "traefik.docker.network=world"
      - "traefik.enable=true"
      - "traefik.frontend.passHostHeader=true"
      - "traefik.frontend.headers.STSPreload=true"
      - "traefik.frontend.headers.STSSeconds=31536000"
      - "traefik.frontend.headers.ForceSTSHeader=true"
      - "traefik.frontend.headers.STSIncludeSubdomains=true"
      - "traefik.frontend.headers.contentTypeNosniff=true"
      - "traefik.frontend.headers.frameDeny=true"
      - "traefik.frontend.headers.customFrameOptionsValue=SAMEORIGIN"
      - "traefik.frontend.headers.browserXSSFilter=true"
      - "traefik.frontend.headers.referrerPolicy=no-referrer"
      - "traefik.frontend.headers.contentSecurityPolicy=default-src 'self'; script-src 'self'"

In this setup I run syncserver behind traefik configured automatically via labels. Notice SYNCSERVER_FORCE_WSGI_ENVIRON=false. We do not need to set this to true due to the usage of SYNCSERVER_FORWARDED_ALLOW_IPS=127.0.0.1,172.18.0.2,172.18.0.1 and the header X-Forwarded-For that we receive via trafik (configured to do so via the label traefik.frontend.passHostHeader=true).

The SYNCSERVER_SECRET environment variable has been generated with the command:

head -c 20 /dev/urandom | sha1sum
And inserted in a .env file containing:

# This file is used to define environment variables to be used
# for variable substitution in your docker compose file.
# https://docs.docker.com/compose/env-file/
SYNCSERVER_SECRET=YOUR_SECRET_GOES_HERE

Now, in order for Firefox to attack our Sync Server, we need to set it up as follows (I blatantly copy from this blog post):

  1. Go to about:config and search for identity.sync.tokenserver.uri.
  2. Now change replace https://token.services.mozilla.com/1.0/sync/1.5 with https://yourawesomeurl.tld/token/1.0/sync/1.5. Don’t forget the token, because the self hosted Firefox sync server is exposing the token server in a subdicrectory.
  3. Just to make sure everything is set up correctly, log out of Firefox (if you logged in before) and restart the browser.
  4. Now go to the settings, login with your Firefox account and the synchronization can start.

As you might know already, we still need the Firefox Account service from Mozilla for all these to work. I am pretty sure I will be trying to set it up myself in a not too distant future… 🙂

bookmark_borderMacBook Air SuperDrive on Linux

It turns out that the `MacBook Air SuperDrive` doesn’t work by default on Linux even though the device is properly recognized.

After some research on the web, I found this and this to find out how to make it work.

I ended  up creating the file /etc/udev/rules.d/60-apple-superdrive.rules with the content:

# Apple's USB SuperDrive
ACTION=="add", ATTRS{idProduct}=="1500", ATTRS{idVendor}=="05ac", DRIVERS=="usb", RUN+="/usr/bin/sg_raw /dev/$kernel EA 00 00 00 00 00 01"

And triggered the command:
udevadm trigger

Now the device accepts the insertion of CDs

bookmark_borderTizen SDK on Fedora 26

I recently bought a Samsung Gear S3 which uses Tizen as its operating system.

As I have been trying to improve my development skills, I would also like to develop some app for the watch ( my first thought was something related to Telegram ).

Let’s start with installing the SDK!

Get the SDK from here. Samsung doesn’t officially support anything other than Windows, Mac OS X or Ubuntu but I thought I could give a try to installing it on my Fedora Workstation.

Once I downloaded the installer and tried to run it:

chmod +x web-ide_Tizen_Studio_1.2_usa_ubuntu-64.bin  
./web-ide_Tizen_Studio_1.2_usa_ubuntu-64.bin

There is apparently something not right:
run installer

So some dependencies are missing? let’s install them:

dnf install libgnome qemu-user expect  
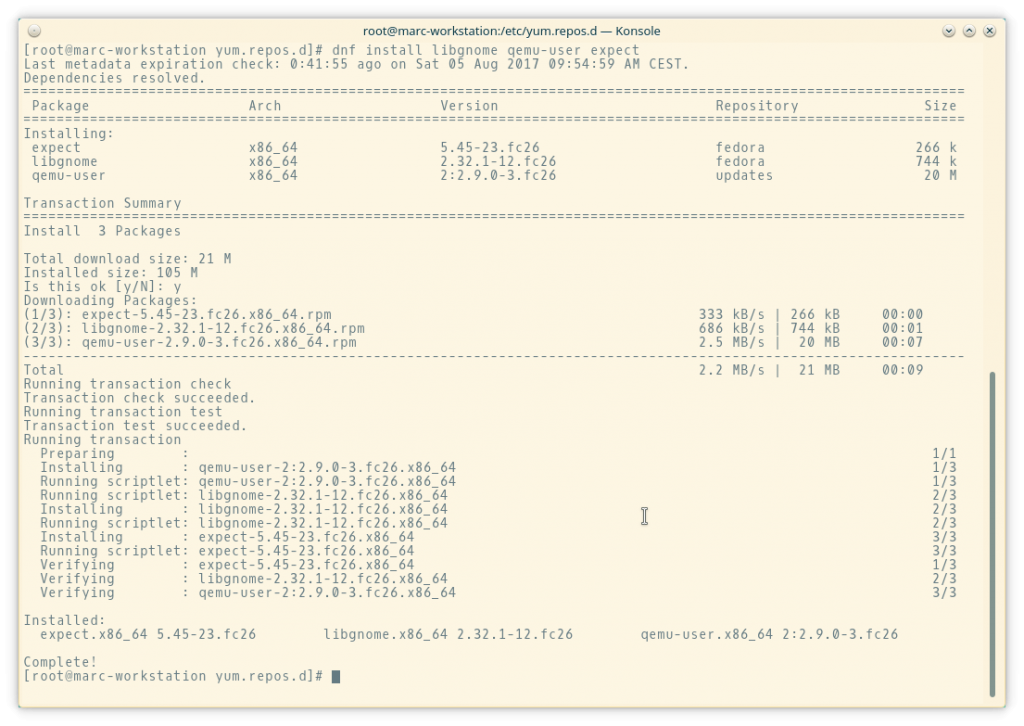
install dependencies

Triggering again the installer brought me to this:
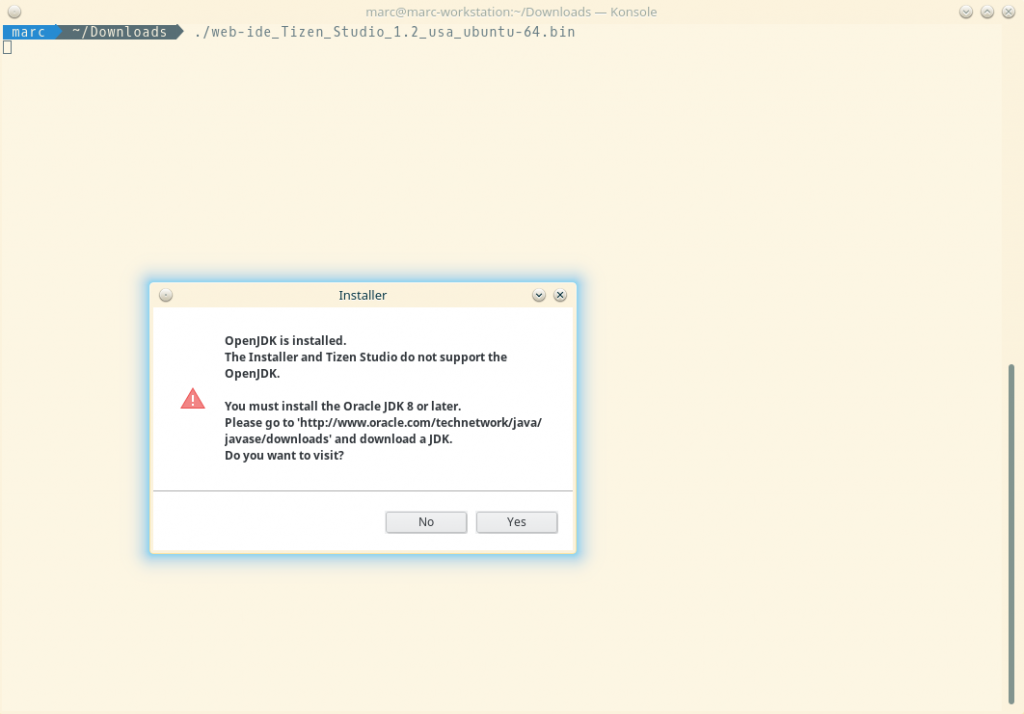
OpenJDK not supported

If you follow the link suggested:

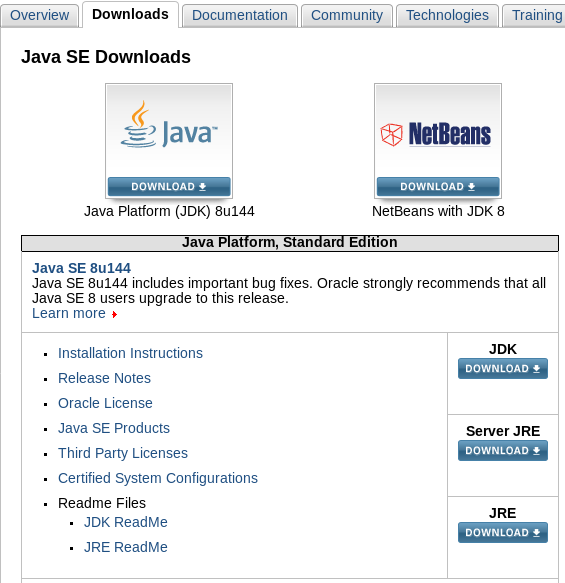
java jdk webpage.

Trying to download the JDK will lead you to:
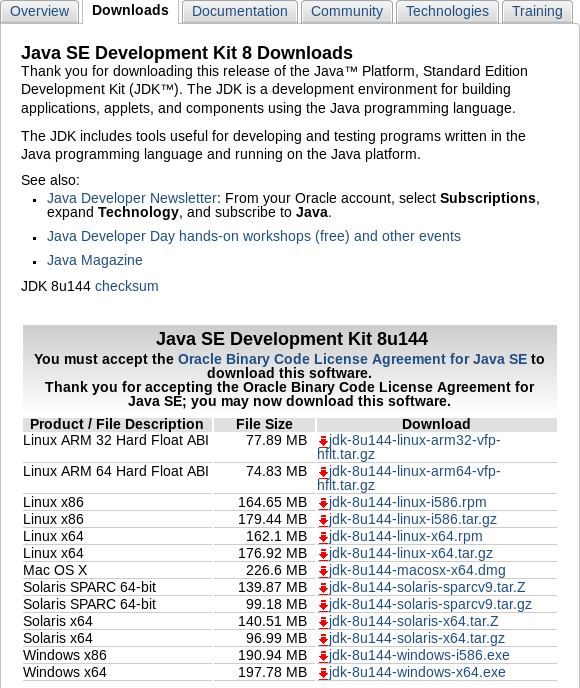
sdk rpm download

Download the 64 bits RPM (after agreeing to the license, of course…)

Now it’s time to install it:

dnf install jdk-8u144-linux-x64.rpm  
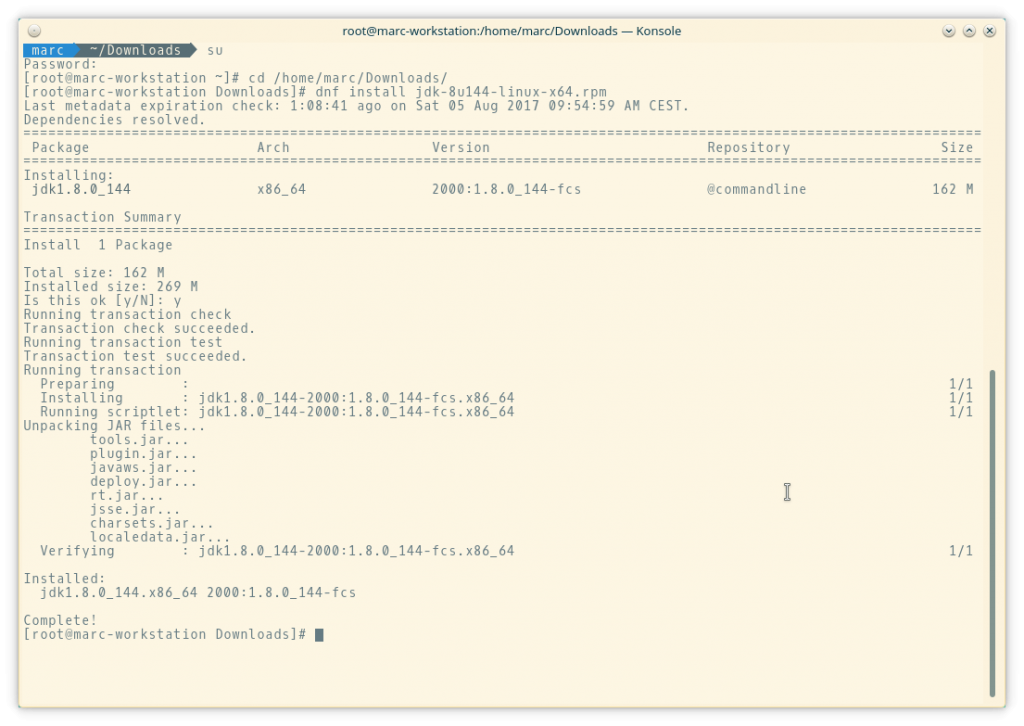
oracle jdk installation

Now, to make the Oracle one the prefered JVM:

alternatives --config java  
alternatives --config javac  
alternatives --config javaws  
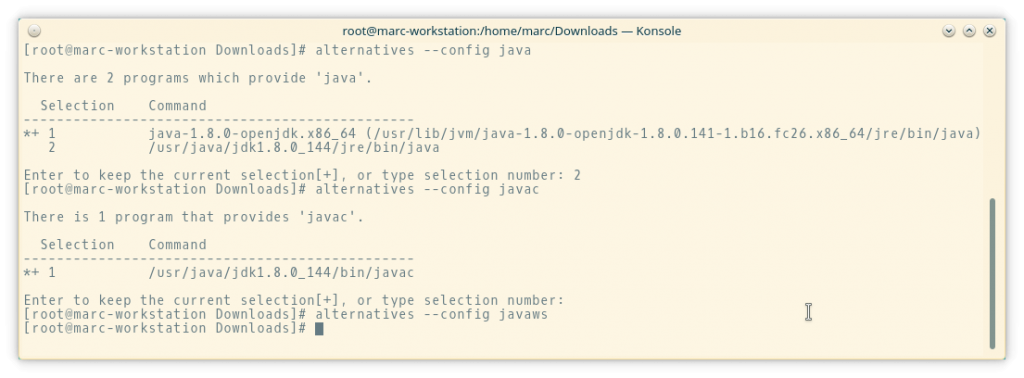
java alternatives

Now time to check everything is as we want:

java -version  
javac -version  

java version

Now, running the installer again:

./web-ide_Tizen_Studio_1.2_usa_ubuntu-64.bin

First thing it will ask you is to accept the Software License Agreement:
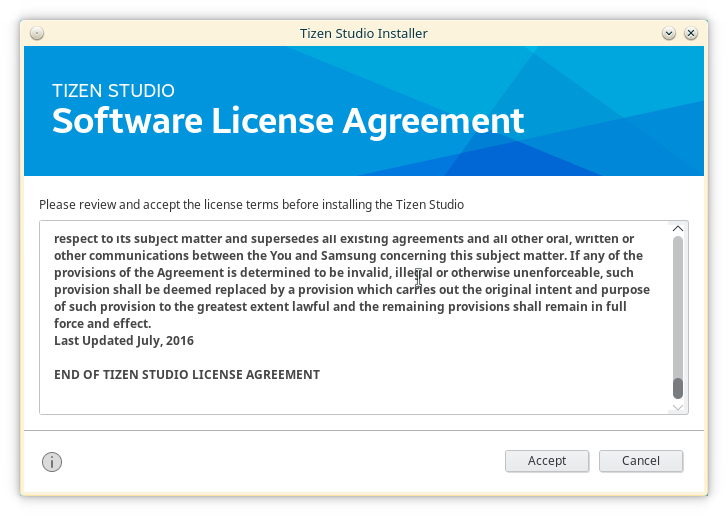
tizen license

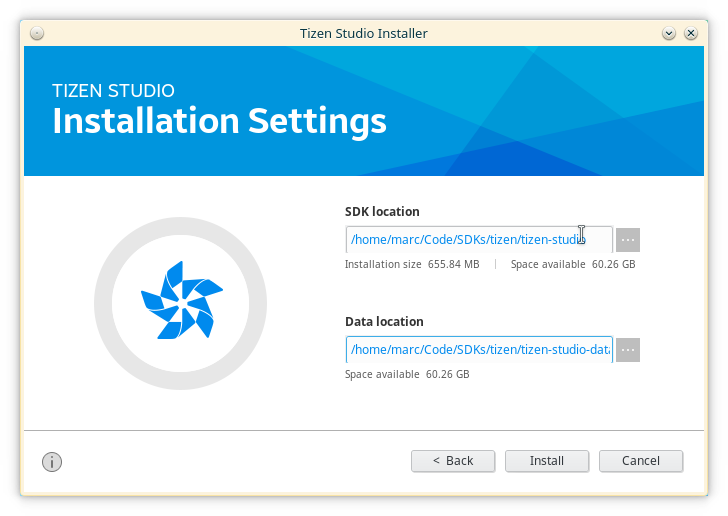
Choose where to install the SDK:
tizen sdk location
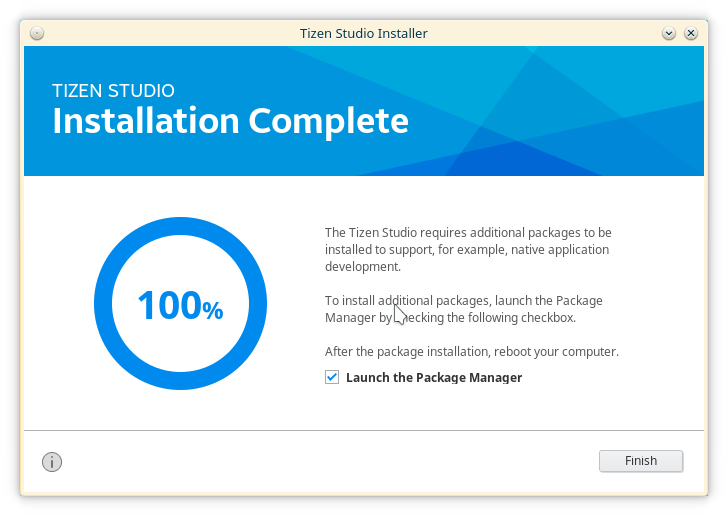
And… et voilà:
tizen finish installation

Once the installation has finished, it will by default launch the package manager:
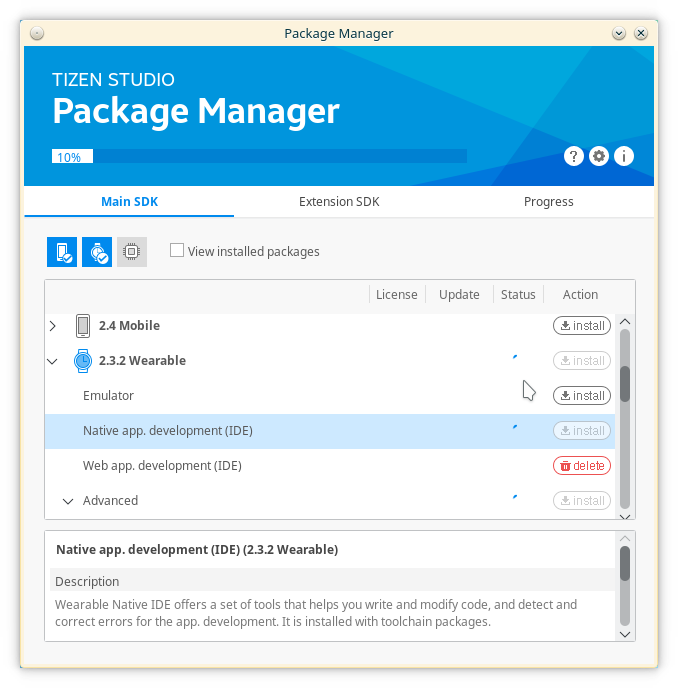
tizen package installation
Some of the packages, like the emulator, will need extra permissions:
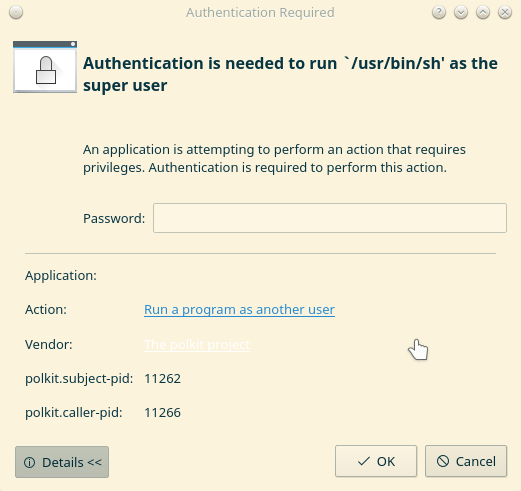
tizen package sudo
Here is the list of the packages I installed:
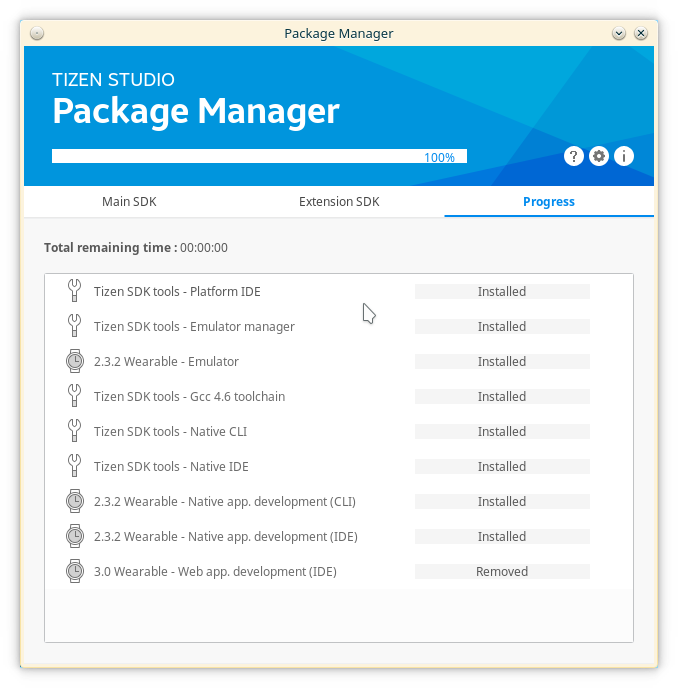
tizen packages installed

Everything is ready…:
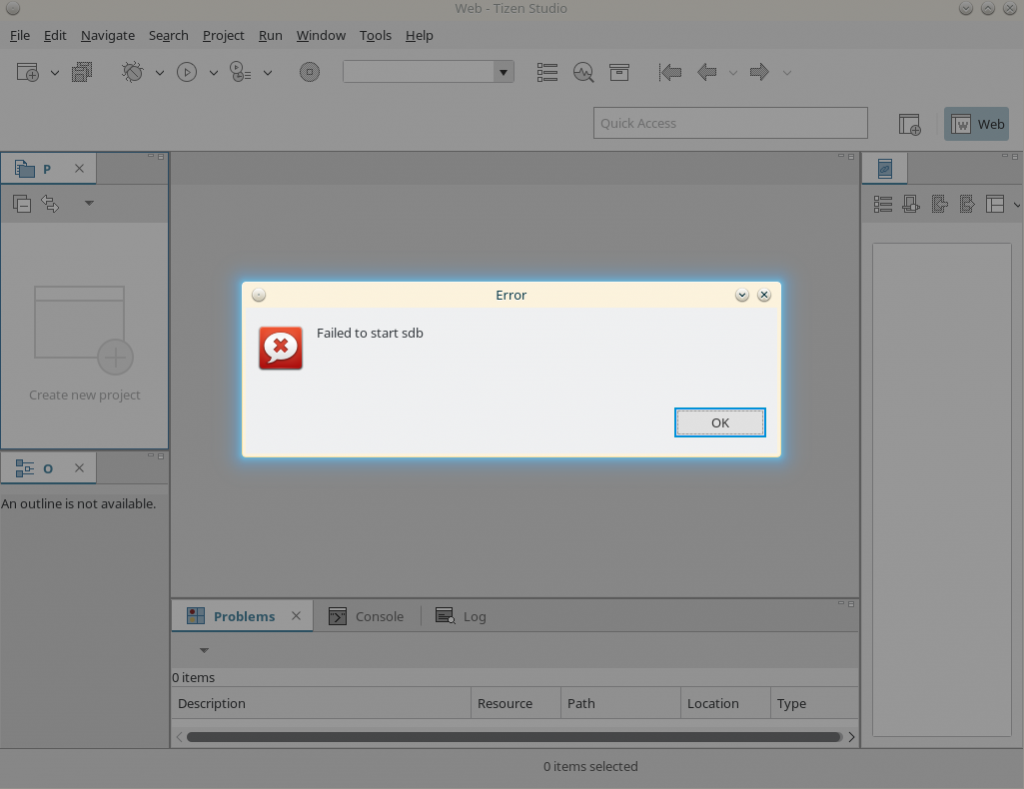
tizen first launch
Oh oh… seems that we need to fix something manually…

Quick investigation lead me to finding out there is a tool named sdb and apparently is missing a library: libcrypto.so.1.0.0:
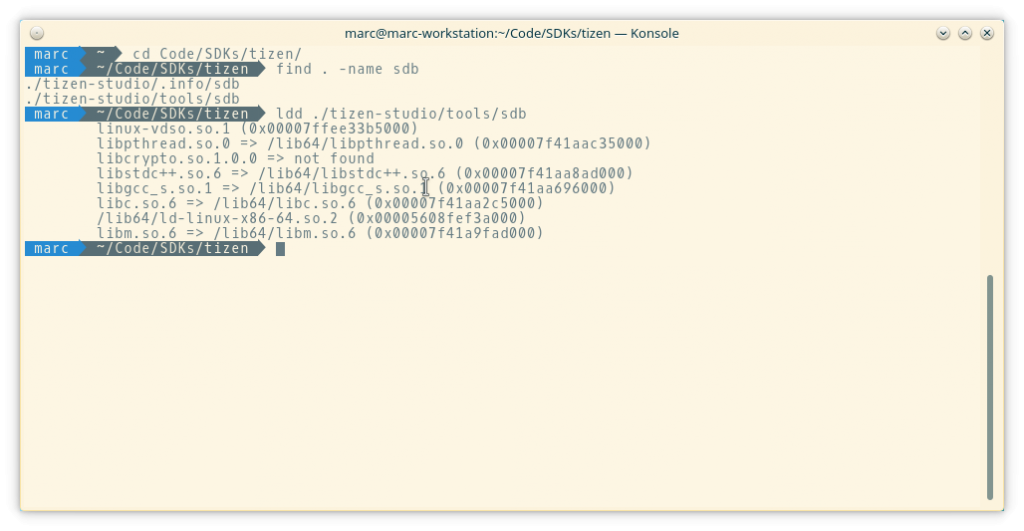
sdb missing library
A quick research on-line lead me here. I don’t really like the solution of installing the Ubuntu library system wide, so I decided to do a small workaround:

mkdir -p /home/marc/Code/SDKs/tizen/ubuntu_libraries  

And I copied from this package the files libcrypto.so.1.0.0 and libssl.so.1.0.0 into that folder.
Turn to create a file in /home/marc/.local/.bin/tizen with this content:

#!/usr/bin/env bash                                                                                        
export LD_LIBRARY_PATH=/home/marc/Code/SDKs/tizen/ubuntu_libraries  
/home/marc/Code/SDKs/tizen/tizen-studio/ide/TizenStudio.sh

and

chmod +x /home/marc/.local/.bin/tizen  

Now I simply need to type tizen and my Tizen Studio will launch:
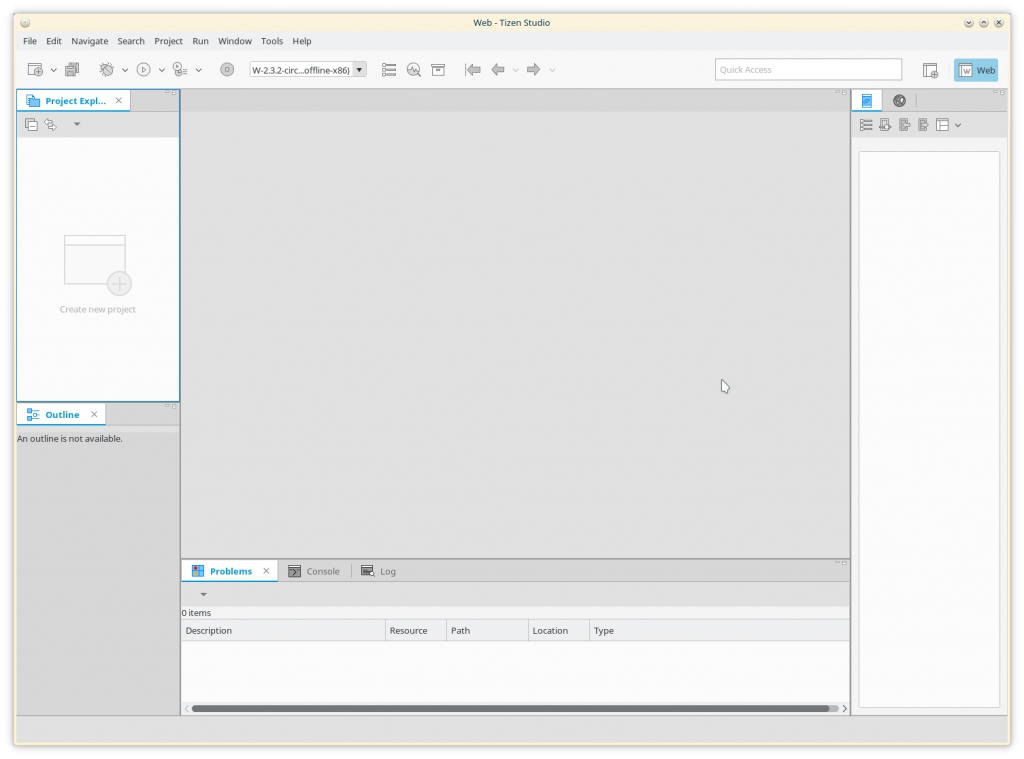
tizen studio running

WARNING: if you launch the SDK from the menus this will not work. The menu entry will still launch /home/marc/Code/SDKs/tizen/tizen-studio/ide/TizenStudio.sh. You can either modify the menu entry or start the IDE via my launcher

Happy hacking!!!

bookmark_borderSetting up a blog…

So I have been thinking for a while on getting back to blog and I figured that I could try to set something up on my home server.

My resources are really limited so, even though I actually hate the trend, I decided to run my blog on Ghost.

I also wanted to have some sort of isolation on the things that run on my server thus I had two realistic options: docker or running traditional Virtual Machines. Remember I mentioned that my resources were limited? Thus, docker was the chosen option.

I didn’t want to serve the blog straight from docker, so I opted for running a web server in front (although this one is not running on docker 😉 ).

So:

server {  
     listen 80;
     listen 443 ssl;
     server_name blog.marcdeop.com;
     ssl_certificate        /etc/letsencrypt/live/blog.marcdeop.com/fullchain.pem;
     ssl_certificate_key    /etc/letsencrypt/live/blog.marcdeop.com/privkey.pem;

     root /var/www/blog;

     location /.well-known {
          alias /var/www/blog/.well-known;
     }

     location / {
       proxy_set_header X-Forwarded-For $proxy_add_x_forwarded_for;
       proxy_set_header Host $http_host;
       proxy_set_header X-Forwarded-Proto $scheme;
       proxy_pass http://localhost:2368;
     }
}

This is not a very complex nginx configuration, essentially it’s just a proxy. The most relevant thing might be the use of Let’s Encrypt ( maybe I write something about it some other time).

Now let’s have a look at how to create the container to run ghost.
Why not use the official image? Well, I actually can’t as my home server is ARM based. I did a quick research on-line and found easypi/ghost-arm and kennethlimcp/armhf-ghost. Neither of them suited me properly as the first one doesn’t have much information regarding how it’s built and the second one, even though looks very nice, builds the images based on Debian and their alpine version seems a little bit outdated. Besides, I got to practice a little bit on how to emulate ARM on my workstation :-).

I followed this guide to set up a VM with ARM emulation so I could quickly build my docker images ( ‘quickly’ is really not the right word, the VM is slow ).

I heavily based my work on the official image with slight changes. You can find the end result here.

Right now I am running the blog on a development version of the docker image but I will try to upload the final one to my recently created docker hub repository.

One the image was built, I only needed to run the container:
docker run -d --restart always -v $blog:/var/lib/ghost -e NODE_ENV=production -p 2368:2368 marcdeop/ghost-arm:0-alpine

The first entry of the blog as it’s looking right now…

I haven’t yet found a theme that I really like, this needs further investigation but so far… I am quite happy with the status.