Today I would like to talk about one of my favorite extensions for Firefox: Tridactyl.
The official website is here and the source code can be found on Github here.
Extracted from their Github repository:
Replace Firefox's default control mechanism with one modelled on the one true editor, Vim.
The main point being: it allows you to browse the internet with vim keybindings and workflows. For instance: j/k will move you through a web page or H/L will move you back and forward through the history.
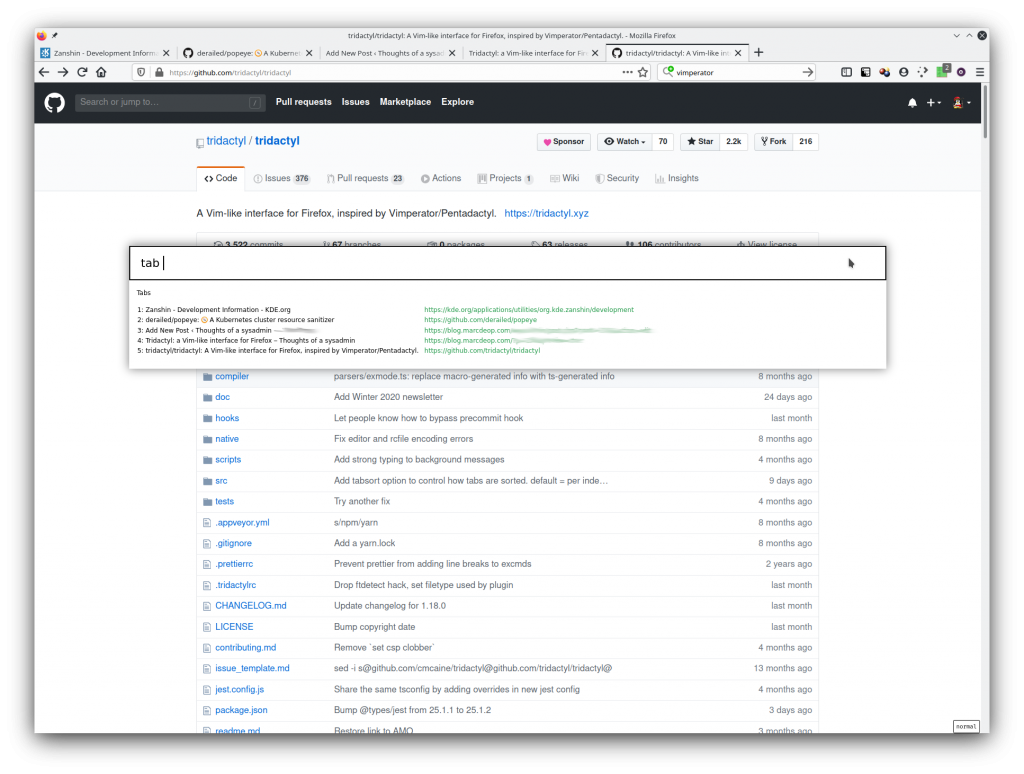
We can also browse through our opened tabs as if they were buffers by pressing b:
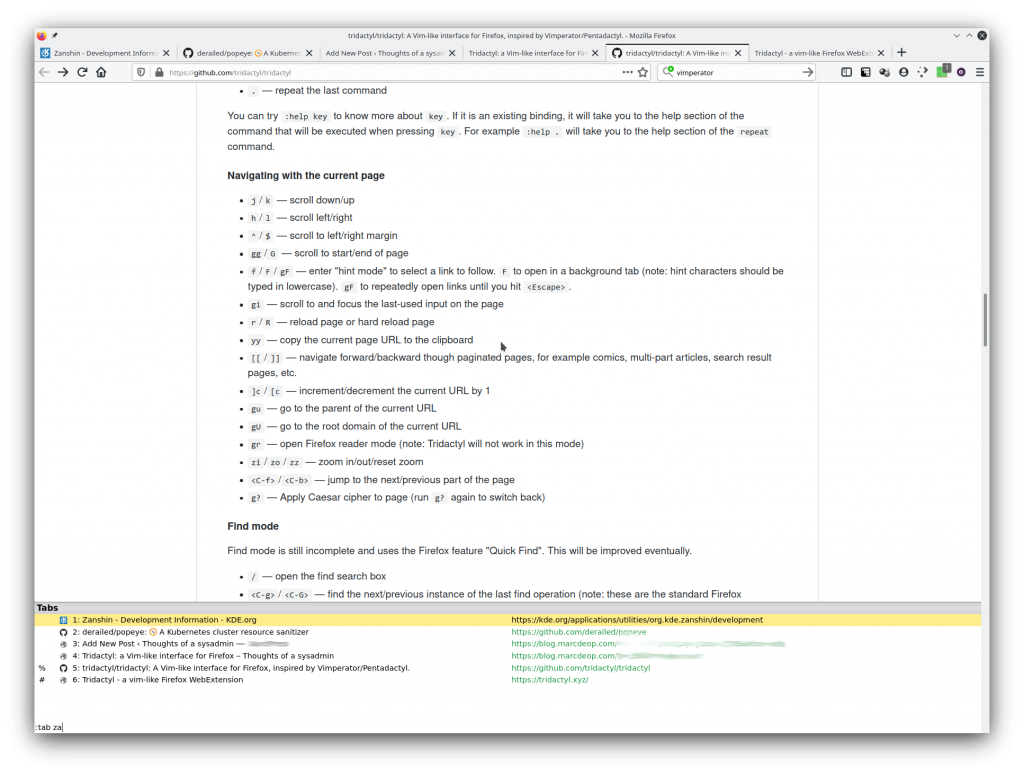
The hint mode is the feature! Press f and you will see:
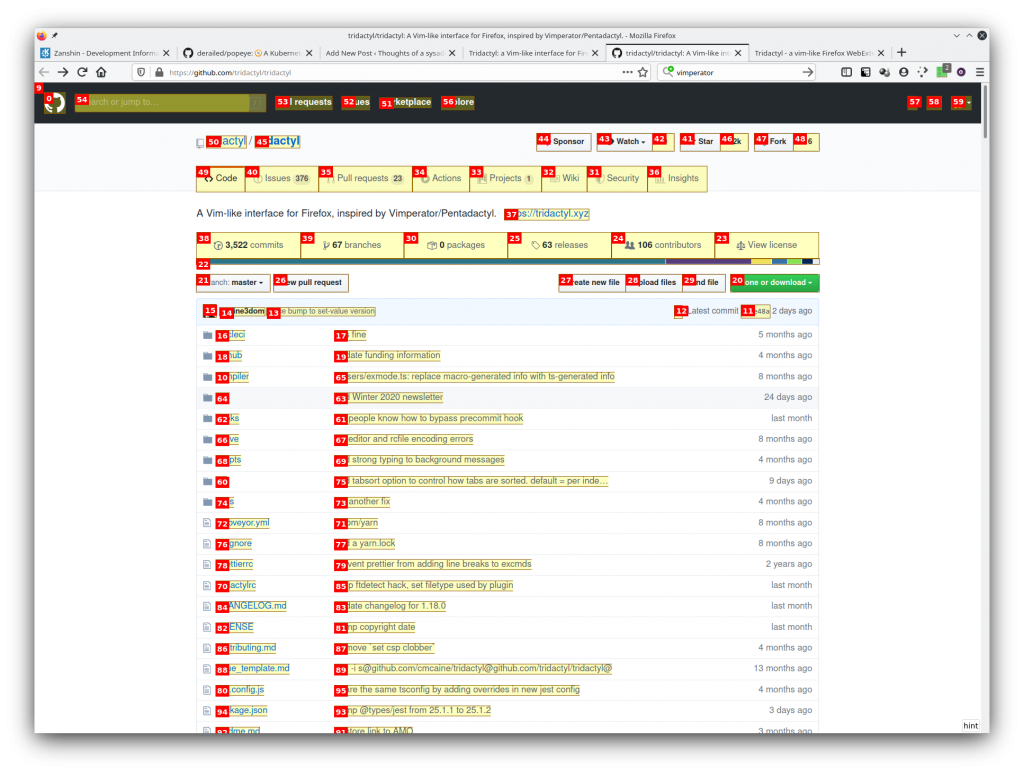
This will label all the hyperlinks (and other elements) and you will be able to follow the hyperlinks by typing the label.
I have a few custom settings for the extension though.
For instance, the default key-bindings to move through the tabs is a bit counter-intuitive (at least to me) so I have those re-mapped:
:bind J tabnext
:bind K tabprev
I like the way Vimperator used to do the hint mode so I have that enabled as well:
:set hintchars 543167890:set hintfiltermode vimperator-reflow
With the above settings you will be able to type the text that you see in the hyperlinks and the extension will reduce the number of options that you have to follow links. For instance, on https://github.com/tridactyl/tridactyl, enter into hint mode via f and then type update:
See? Now you only have two hyperlinks to follow (the ones that contain what you typed)
I also like using a different theme so I have
:colors shydactyl
Tridactyl is very powerful, make sure to go through the readme and :help to find all the options that it offers

 .
.