The Fedora KDE SIG is pleased to announce that KDE Gear 24.12 RC (24.11.90) is available on Fedora 41 via our @kdesig/kde-beta COPR repository
Enjoy!
Archives
bookmark_borderWeb Search Keywords
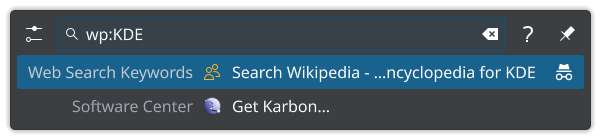
Did you know about a small but very useful feature from KDE?
Open krunner via Alt+Space and type qw:KDE to search Qwant for KDE:

Pressing Enter will open up your browser with the specified KDE search on Qwant!
There are a lot of other Web Search Keywords like:

Translate from English to German on dict.cc

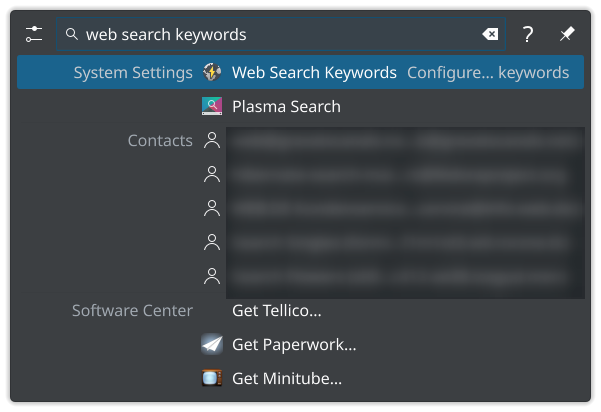
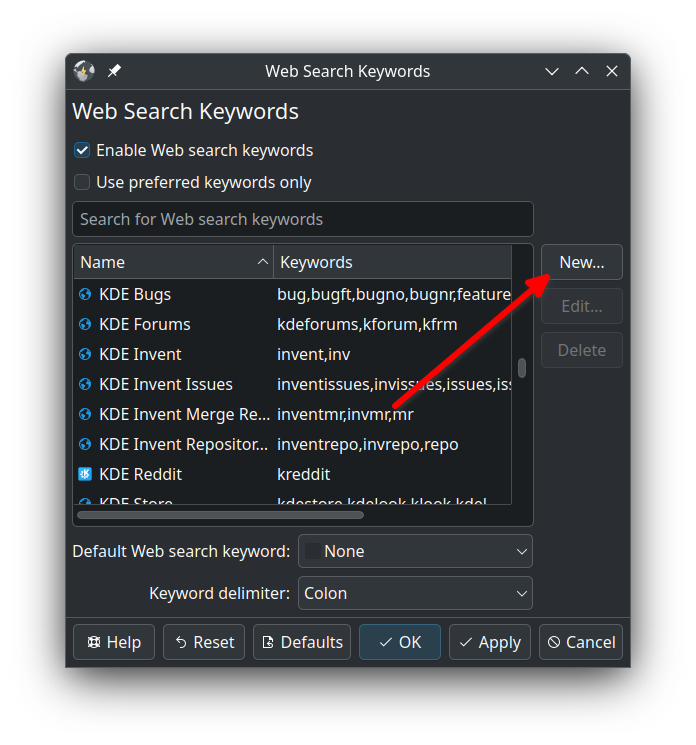
You can find all of them by opening Web Search Keywords on krunner:

Extra: Create your own!
I use often a Fedora tool called COPR, so let’s use it as an example to create our own web search keyword.
Do your search in the webpage:
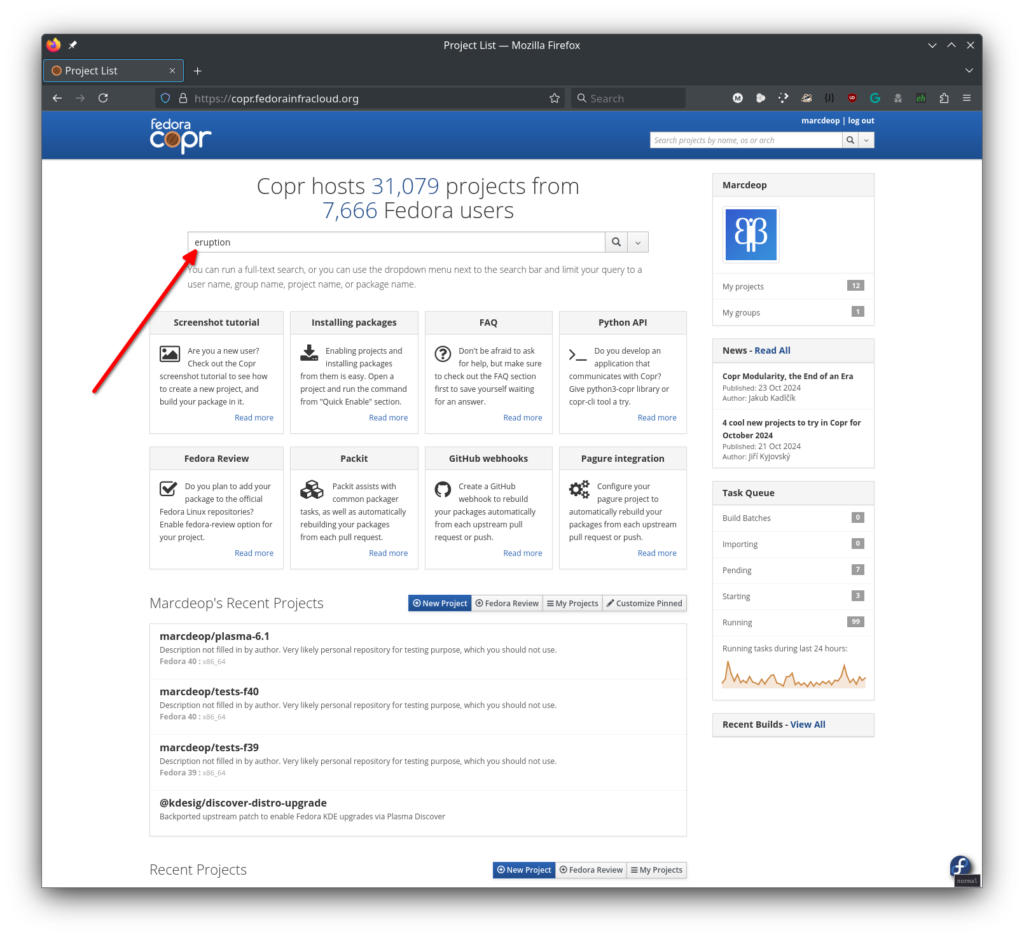
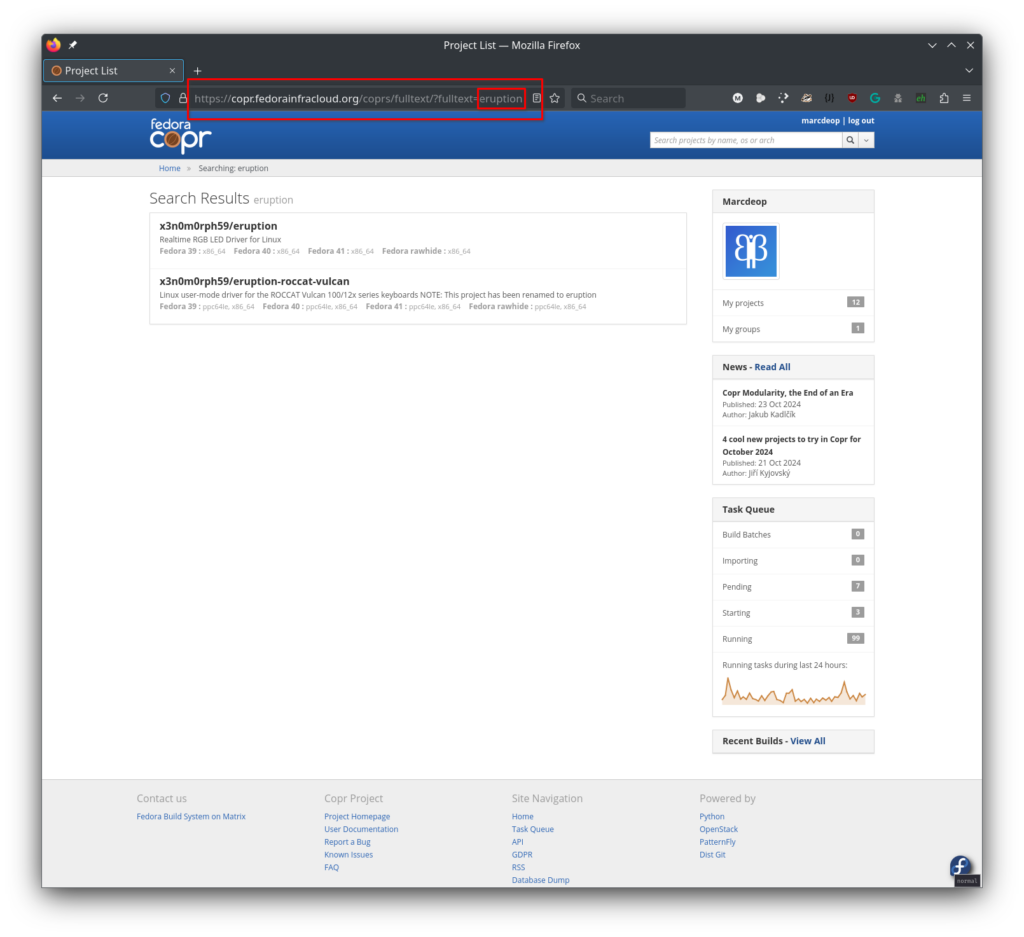
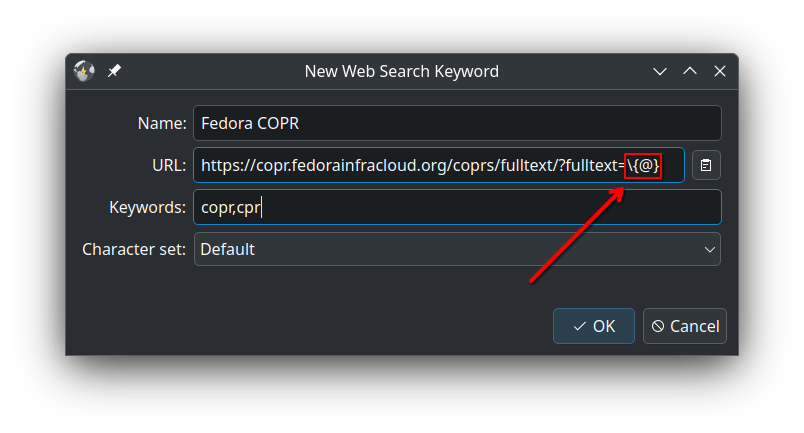
And now the important part you need:
Now back to the Web Search Keyword settings:
Fill in the data needed taking care of the placeholder for our input!:
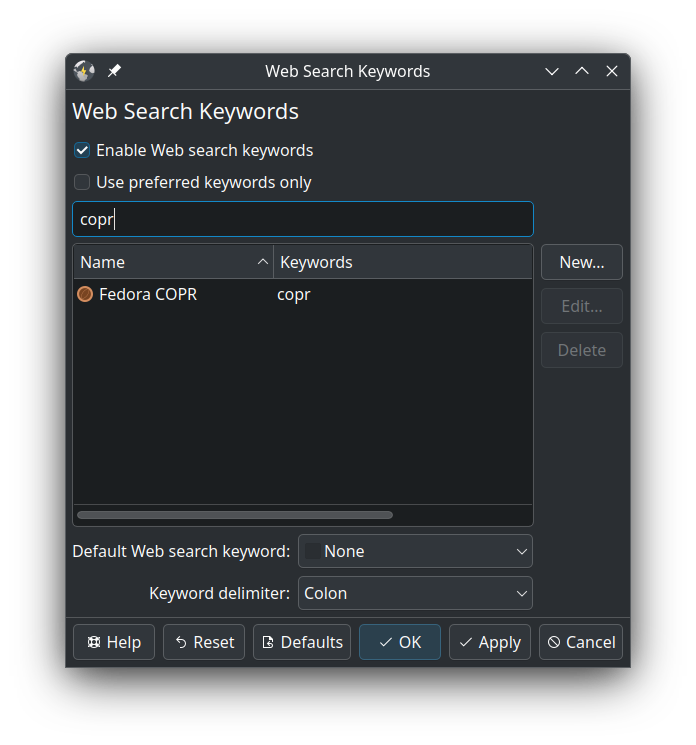
Now we have our own Web Search Keyword:
NOTE: for some reason I had to click on Apply and OK until all the different setting windows were closed before the new custom Web Search Keyword worked
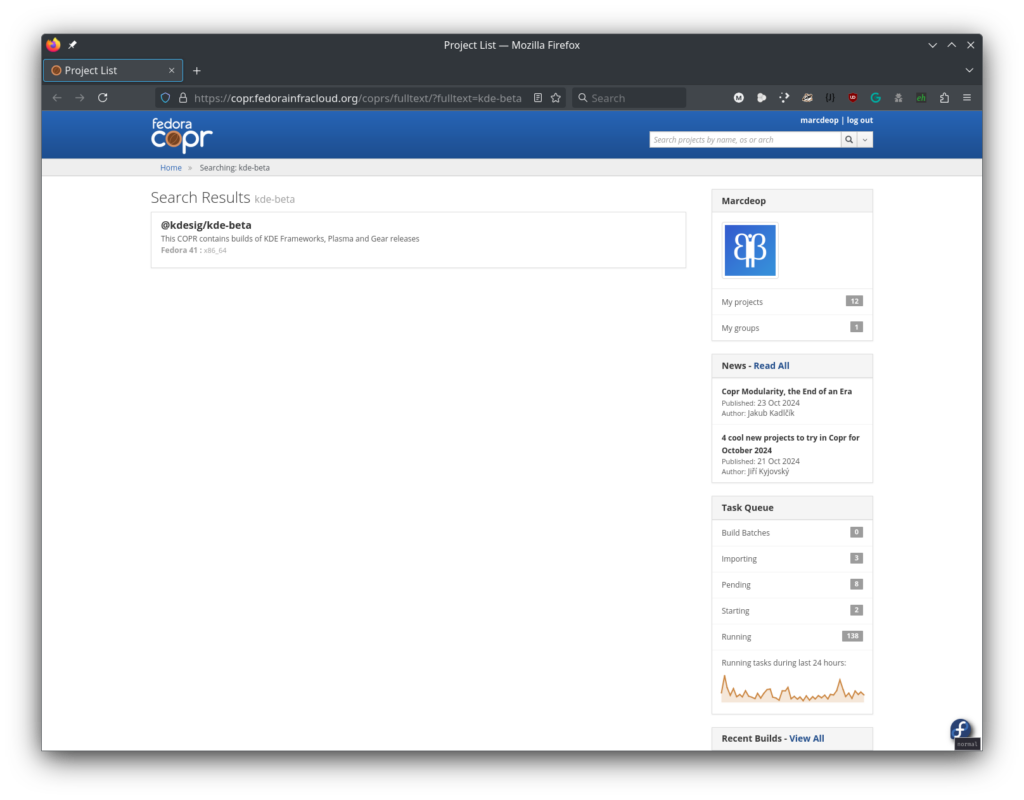
And the result:

I hope it’s useful to somebody!
bookmark_borderFedora KDE Enabling Third Party Repositories
As you may know, Fedora KDE 41 was released a couple of weeks ago.
I wanted to talk about a special feature that our colleague @farchord (with support from upstream developer @Nate Graham) has brought to our Fedora KDE distribution:
Enabling Third Party Repositories With A Single Click!
Thanks to the flexibility of plasma-welcome we can offer this feature 🙂
Right after installing Fedora and on first login you will be presented with the Plasma Welcome window:
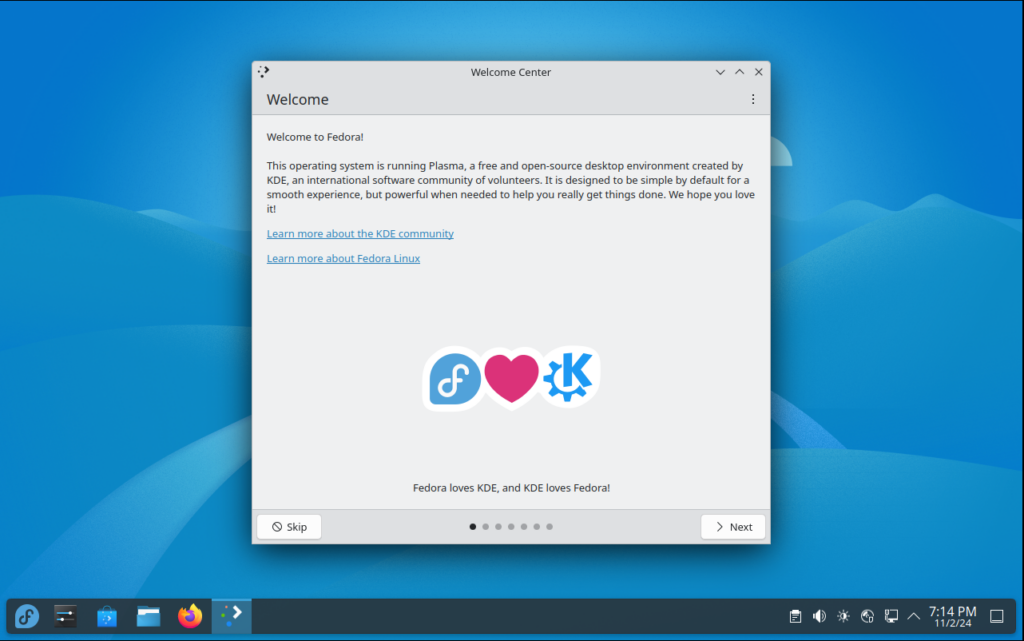
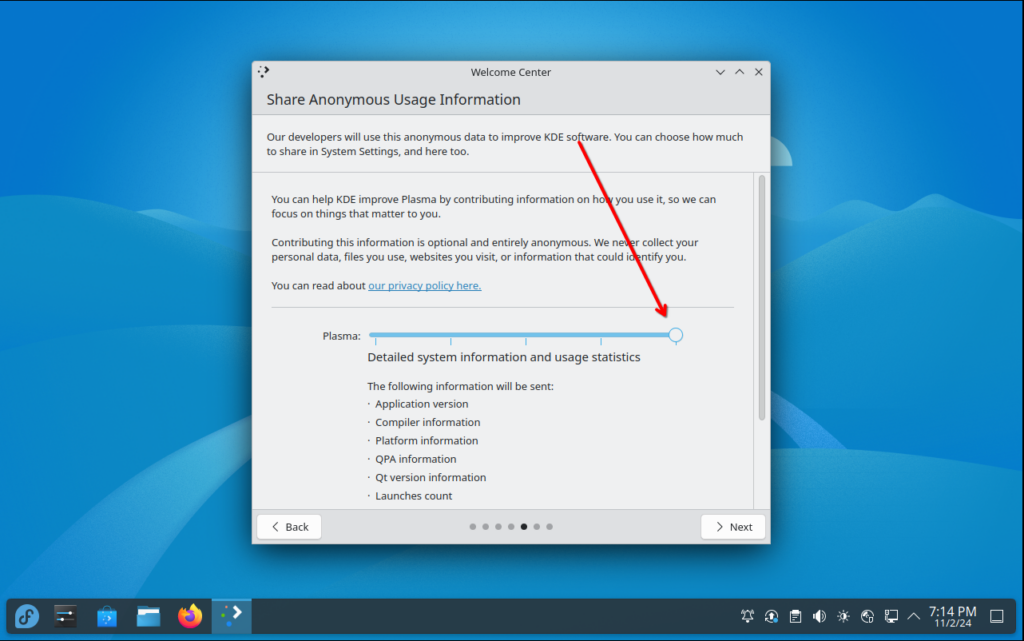
Before you click on Skip , you can go through the different slides to read about KDE and Fedora and also to decide whether you want to contribute with anonymous metrics or not (note: I personally do not):
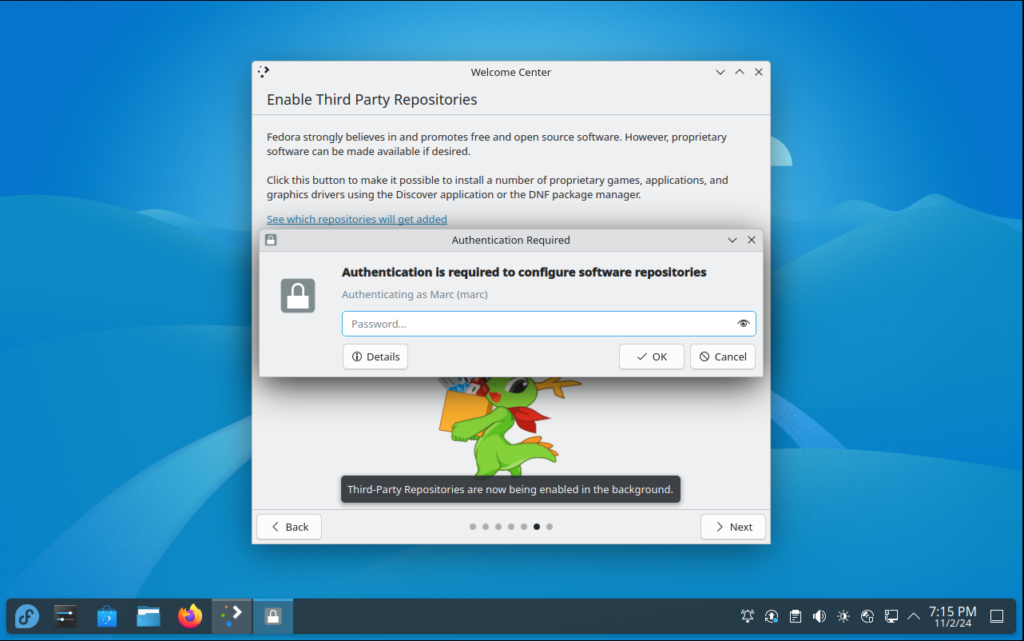
Here is where the interesting part comes in, on the next slide:

With a simple click of a button you will enable the most commonly requested by our users Third Party Repositories like rpmfusion! (note: you will be asked for your administrator password)
Once the request is processed, the message will change to:
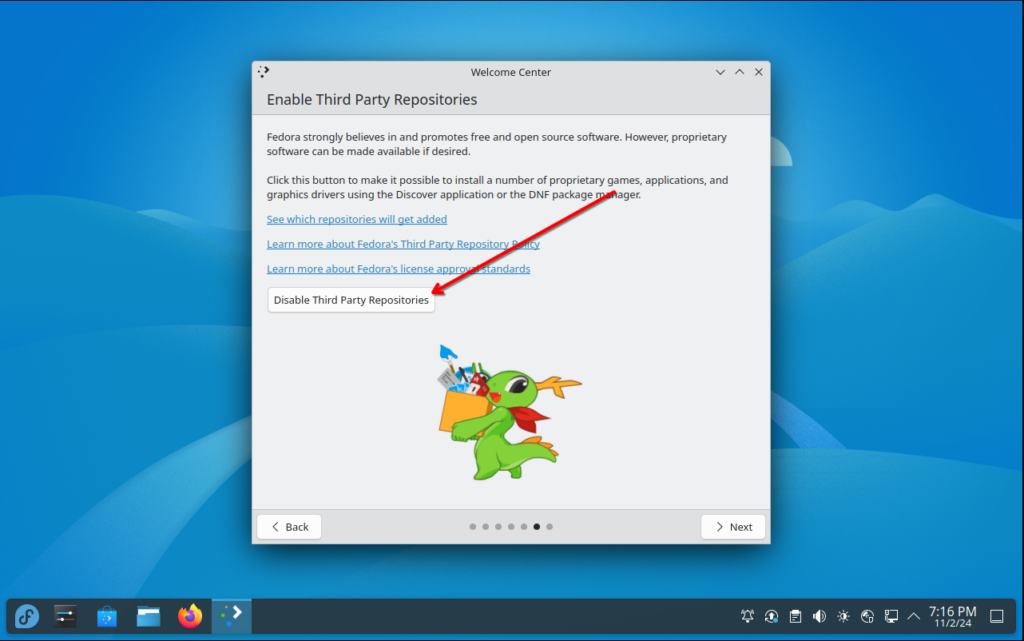
That’s it! You have successfully enabled Third Party Repositories without needing to modify any file or running any command whatsoever 🙂
Before you do anything with your system and your new configuration, I will strongly recommend to update your system via Plasma Discover :
Proceed with all the update and reboot to get the latest and shiniest from our repositories.
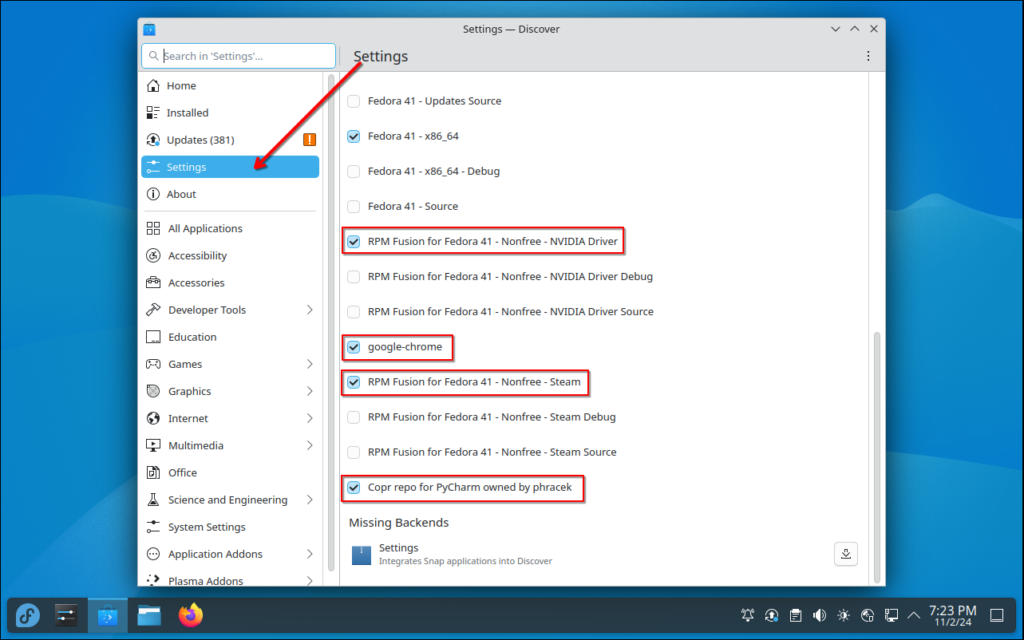
Finally, to verify that the Third Party software is available, you can check:
And that is it!
Enjoy!
This is all thanks to farchord, siosm , aleasto and ngraham‘s work!
bookmark_borderKDE’s 6th Megarelease – RC1 on Fedora Rawhide!
After a few days of work the Fedora KDE SIG is proud to announce the availability of KDE 6th Megarelease Release Candidate 1 on Fedora Rawhide!
For those who like bleeding edge, feel free to try it!
We are very excited and looking forward to Fedora 40 + KDE 6 + Wayland only
Note: right now the update is sitting on testing. If you don’t want to wait a few hours until it reaches stable…
You can access it via a dnf repository like:
[main]
cachedir=/var/cache/yum
debuglevel=1
logfile=/var/log/yum.log
reposdir=/dev/null
retries=20
obsoletes=1
gpgcheck=0
assumeyes=1
keepcache=1
install_weak_deps=0
strict=1

# repos

[build]
name=build
baseurl=https://kojipkgs.fedoraproject.org/repos/f40-build-side-81132/5738561/x86_64bookmark_borderTesters needed: upgrade Fedora KDE with Discover!

This is a call for people out there to help us test the major version upgrades on Fedora KDE via Discover.
In short: no more Dnf System Upgrade for us!
A bit of context/history: for those of you who follow Nate’s blog you might already know what I am talking about. Thanks to the awesome work done by aleasto on this MR, we closed this bug.
There are, of course, a few quirks to solve but essentially it works.
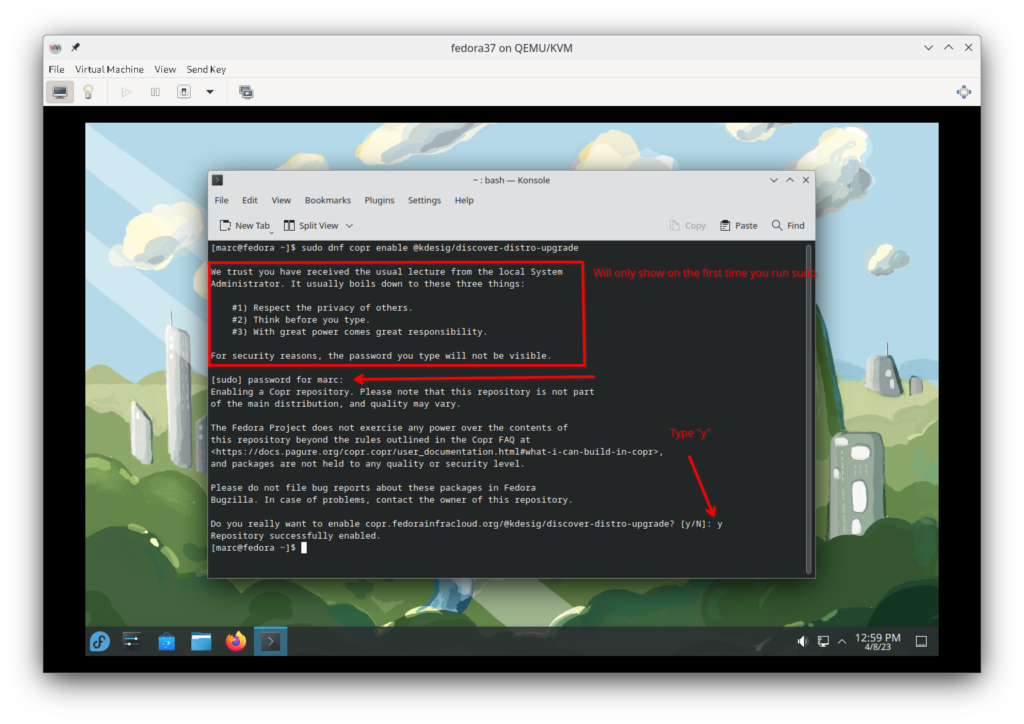
The @kdesig team has enabled a COPR repository for those who want to help us test the upgrades from F37 to F38.
BIG FAT WARNING: Fedora 38 is still in BETA
I will now explain shorty what are the steps you need to follow to perform the upgrade via Discover:
First enable our COPR:
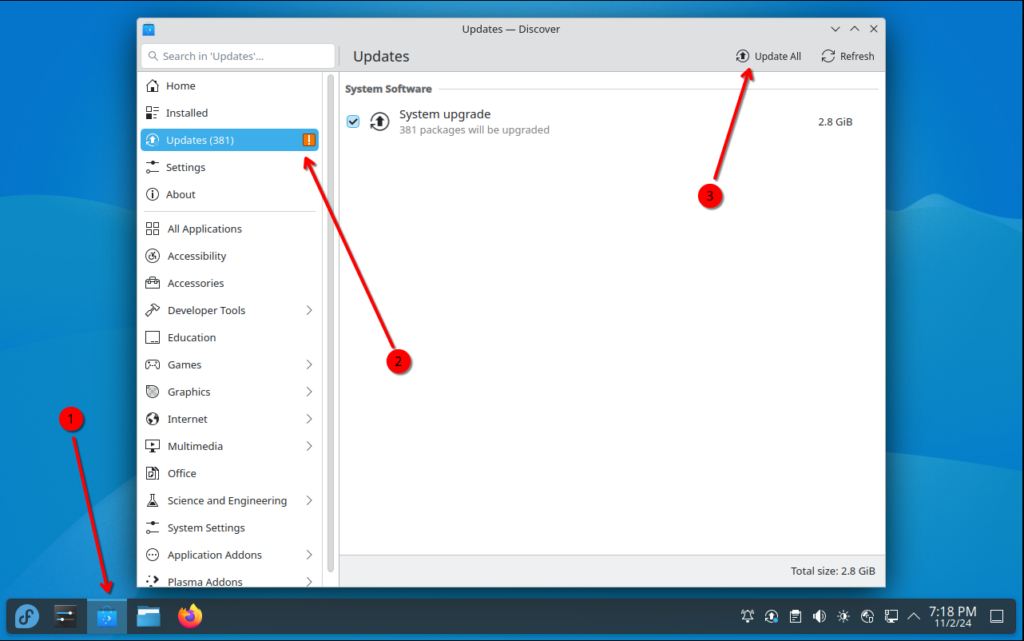
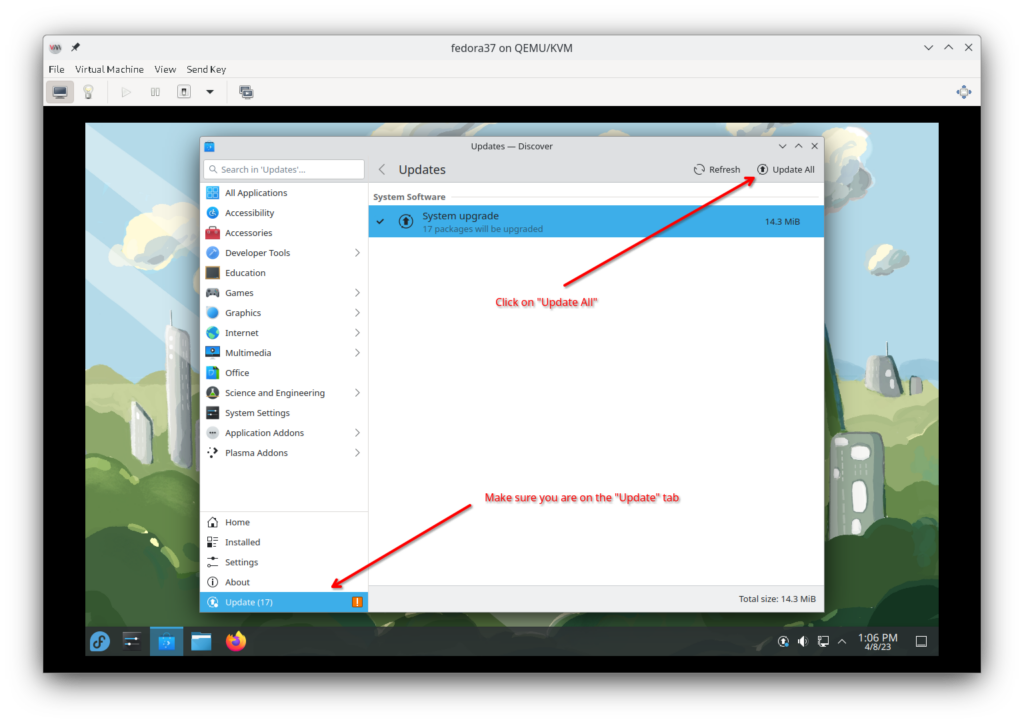
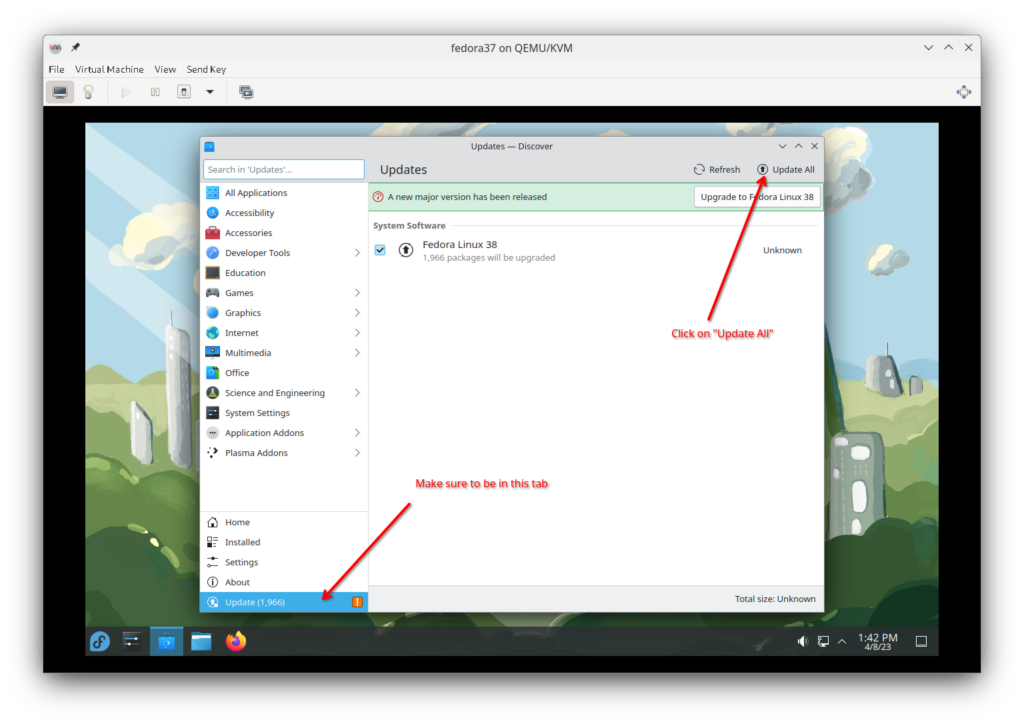
Now open Discover, go to the Update tab, click on Refresh and eventually on Update All:
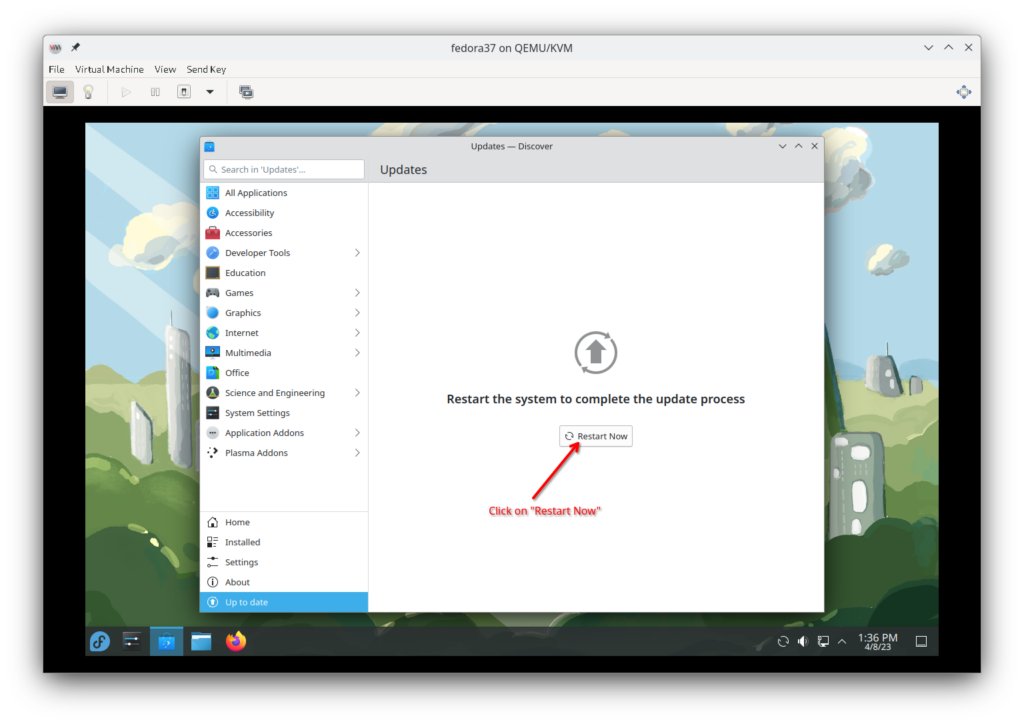
Click on Restart Now to trigger the installation of our patched discover
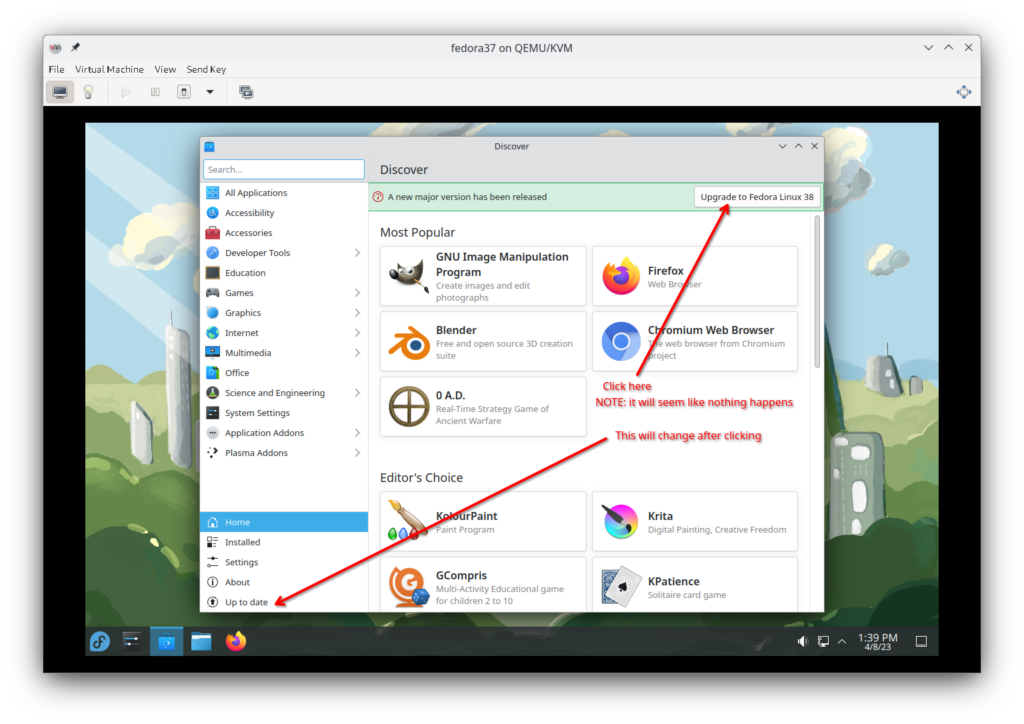
Once you reboot, open Discover again and after a few seconds click on Upgrade to Fedora Linux 38:
Switch to the Update tab and wait until the progress bar finishes. Finally click on Update All:
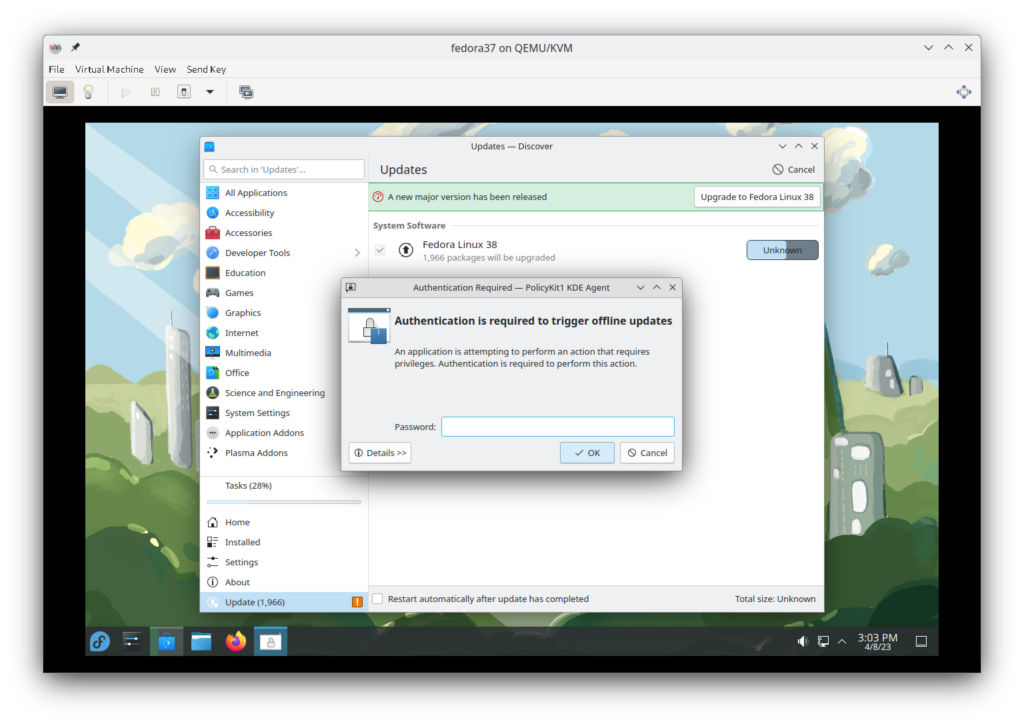
Now be patient as many packages will need to be downloaded. When it finishes, you will be asked for your password:
Important note: there is a known bug which might trigger an error message at this point. If you see it, don’t panic, just close the message and click on Update All again. This time everything should work.
Time to Reboot, grab a coffee and after a few minutes… you shall boot into Fedora 38!!!
Please try it out and give us feedback on our Matrix room 🙂
Looking forward to your feedback!